Basic Setup
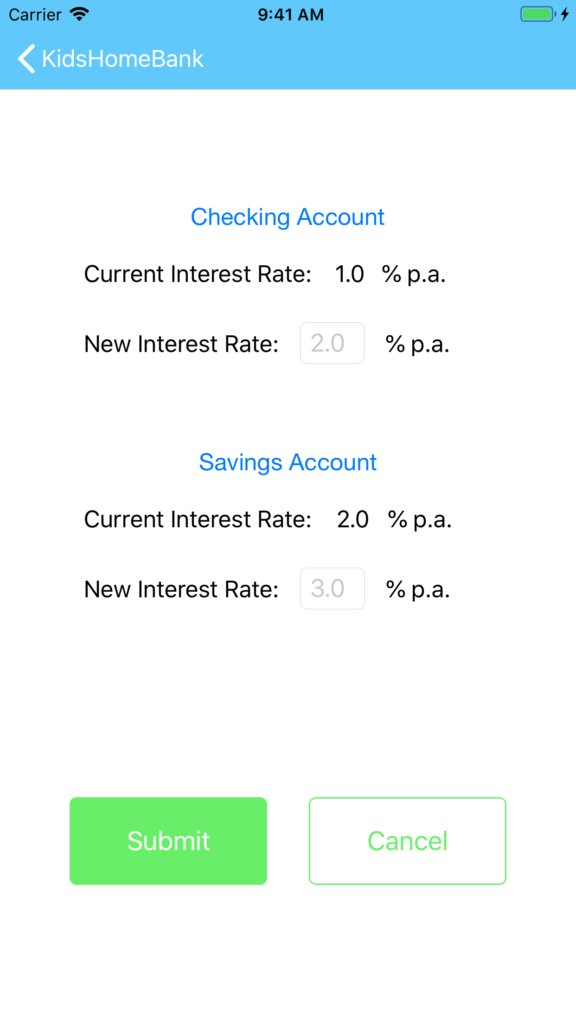
Setup the Parental Passcode
The first time you use the HomeKidsBank, you will be required to set up a numeric Parental Passcode to control access to all the kids account.
The Parental Passcode allows you to perform monetary transactions (credit, debit or transfer) on the kids' accounts.
Setting Interest Rates
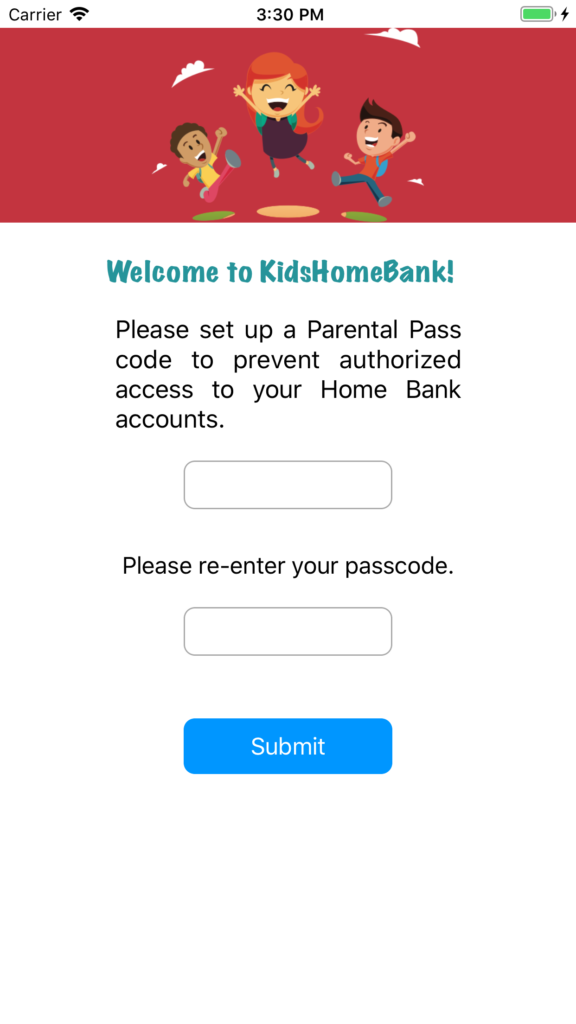
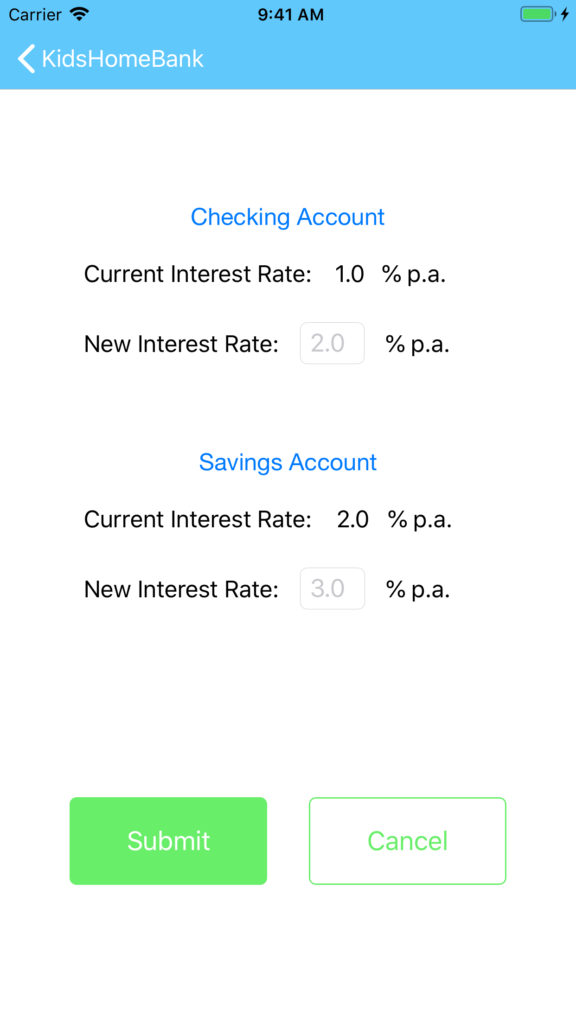
After setting the default Parental Password, you will be shown a screen to provide your interest rates for the kids' accounts. The default interest is 1.0% p.a. for Checking accounts and 2.0% p.a. for Savings account.
You can input your new interest rate and click "Submit" or just click "Cancel" to accept the default Interest Rates.
Adding a New User
Click on the "+" icon on the top right corner to add a new user. If Parental Lock is on, you will be asked to enter your Parental Passcode first. Once unlocked, a new popup will appear for you to add the child's name.
The first time you try to access the child's account, you will be asked to set up a Child Passcode. The child Passcode allows the child to view his or her own account details.
By default, a Checking account and a Savings account will be created for each new Kid.
-
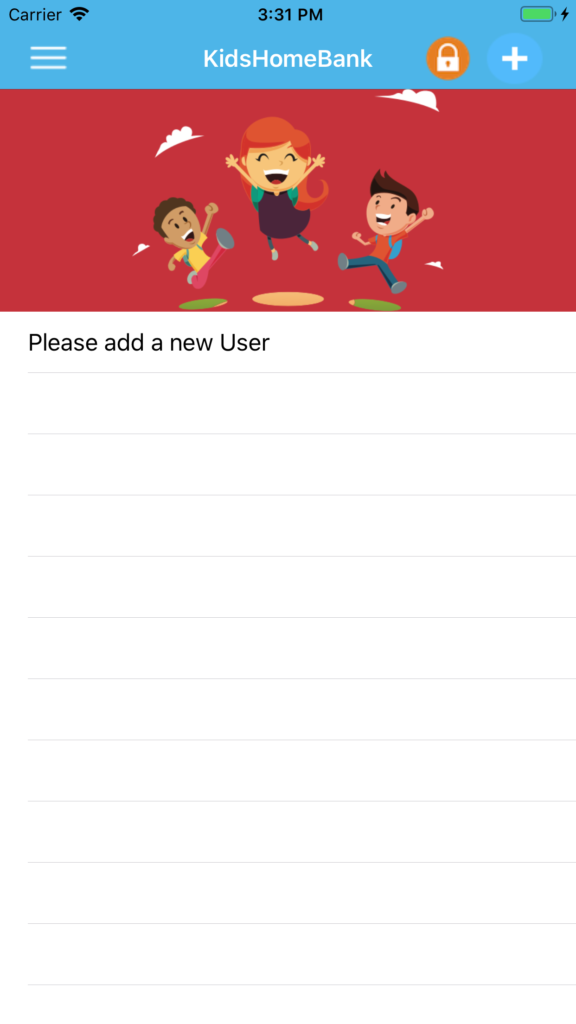
Click '+'. -

Enter Parental Passcode. -
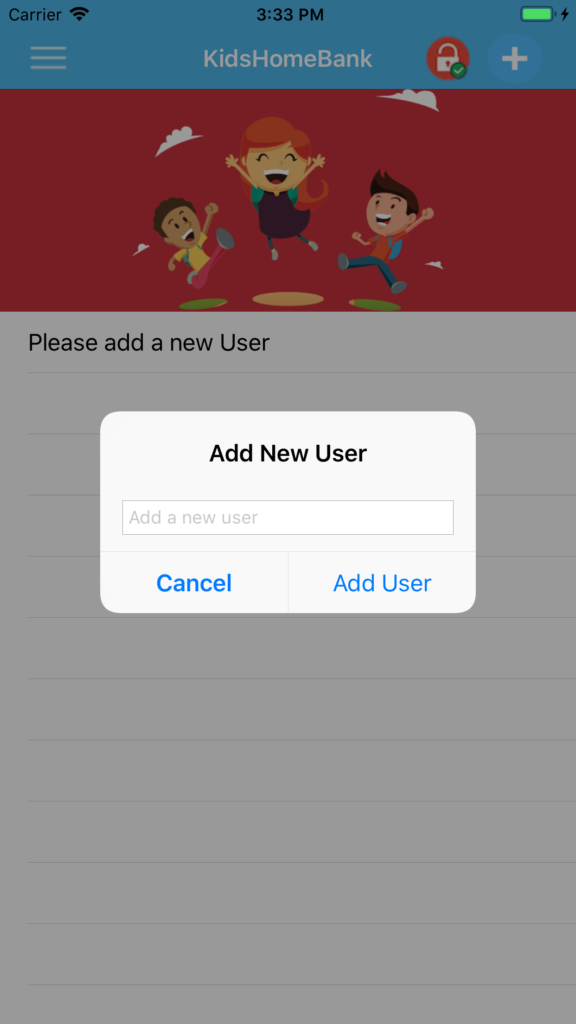
Enter New User's Name. -
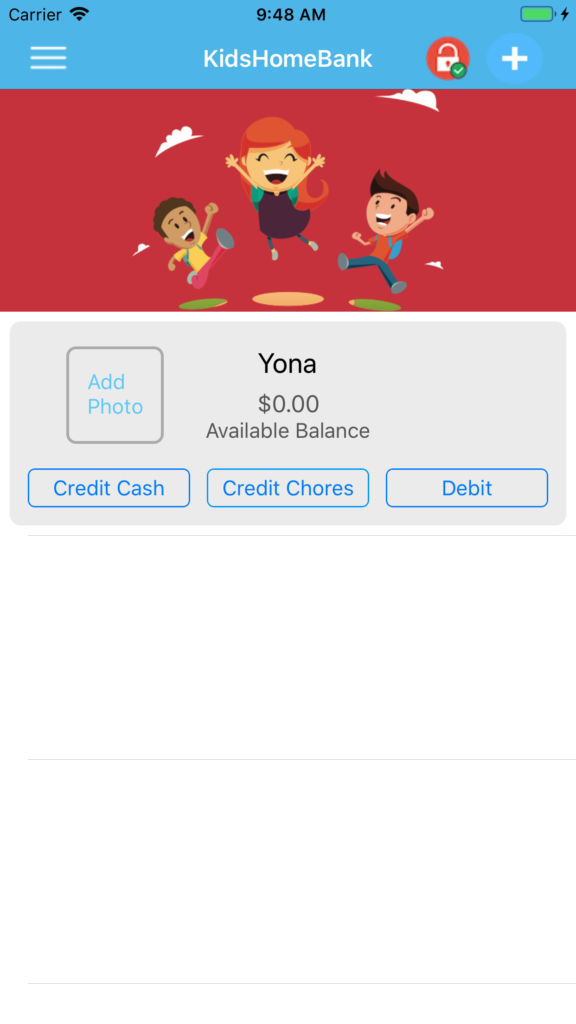
New User account created. -
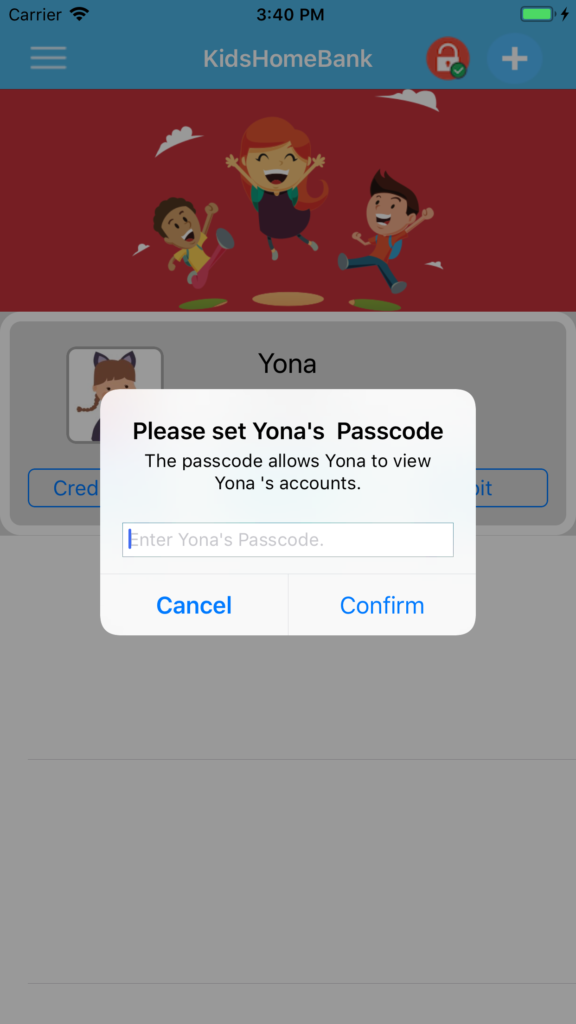
Setup Child Passcode. -

Default Checking and Savings accounts created.
Credit Cash
Click on "Credit Cash". Enter the amount of money and text description (optional). Click "Submit".
-

Click on "Credit Cash". -
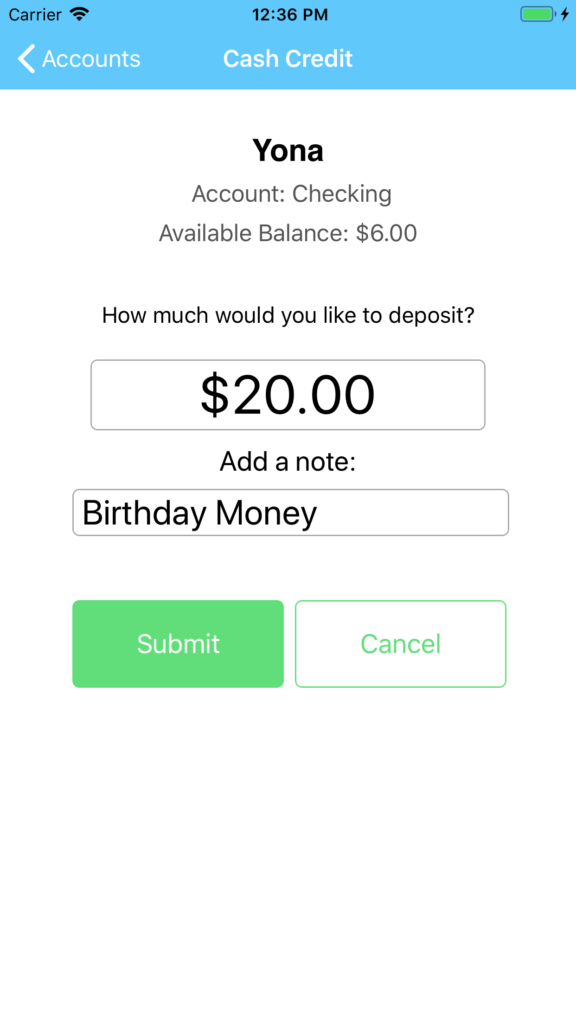
Enter amount and note. Click "Submit".
Debit Cash
Click "Debit". Enter amount to debit and note (optional, default note is "Cash Withdrawal"). Click "Submit".
-

Select "Debit" -
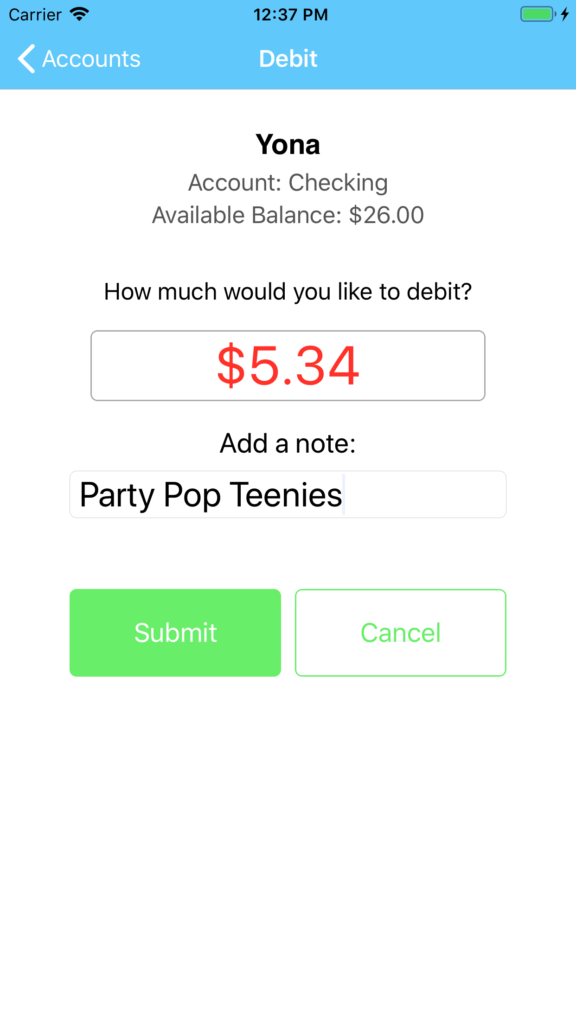
Enter amount and note. Click "Submit"
Transfer Cash
Click "Transfer" in the Child's Accounts' view. Select the accounts to transfer from and transfer to. Enter the amount to transfer. Click "Submit".
-
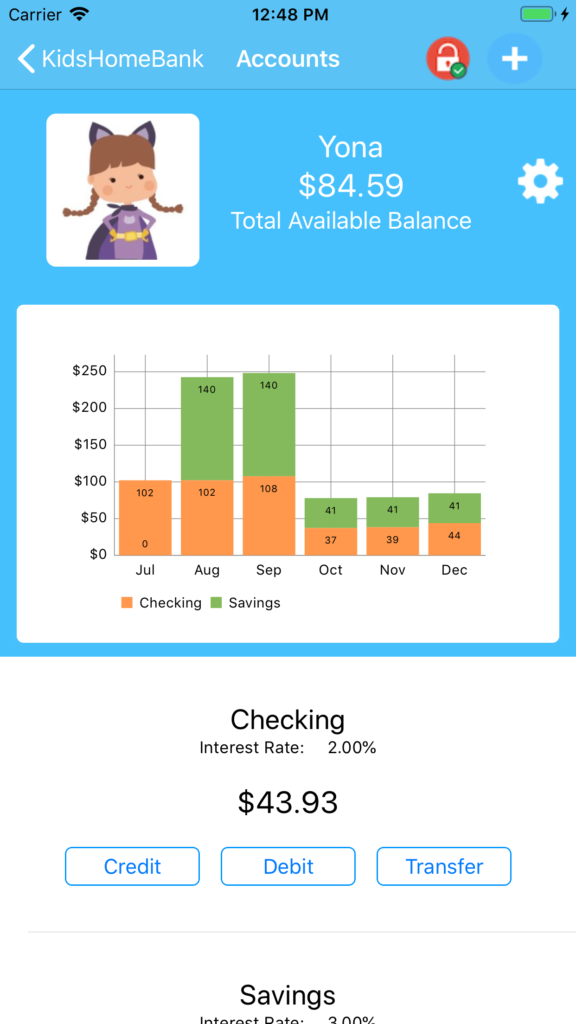
Select "Transfer" from the account view. -
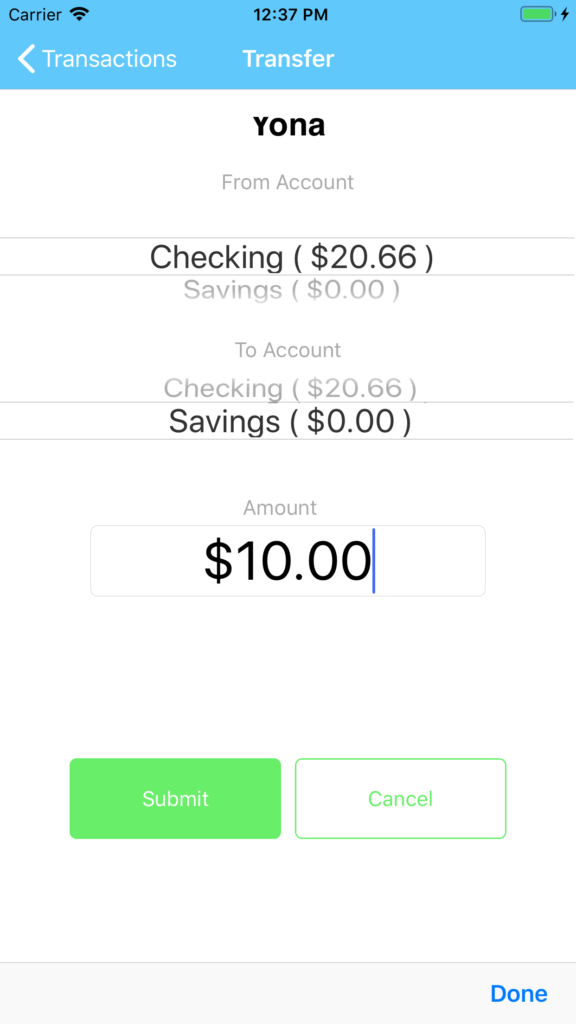
Select From and To accounts. Enter amount to transfer. Click "Submite"
Chores Setup and Payment
Customize Chores List for each Child
Each child has their own defined chores list. You can edit the default list by clicking on "Credit Chores" for each child on the Home Screen.
You can add a new chore by clicking on the '+' icon on the top right corner.
You can slide to the left to delete any chores from the list.
You can tap on any chore to edit the chore name and value.
You can hold and move (long press and move the chore item up or down) to reorder the chores.
-

Click "Credit Chores". -
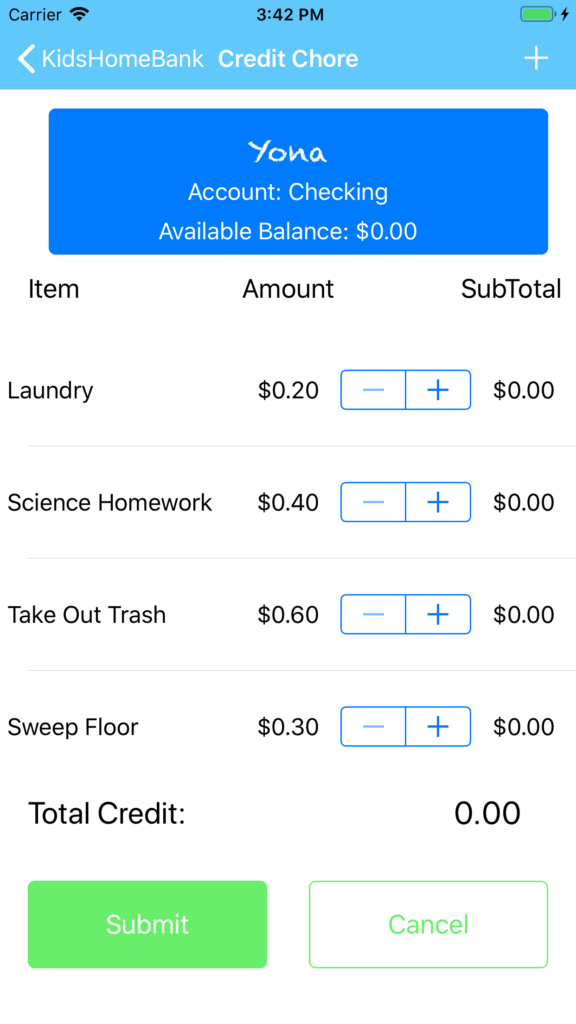
Chores List for each Child. -

Click on '+' to add a new Chore. -
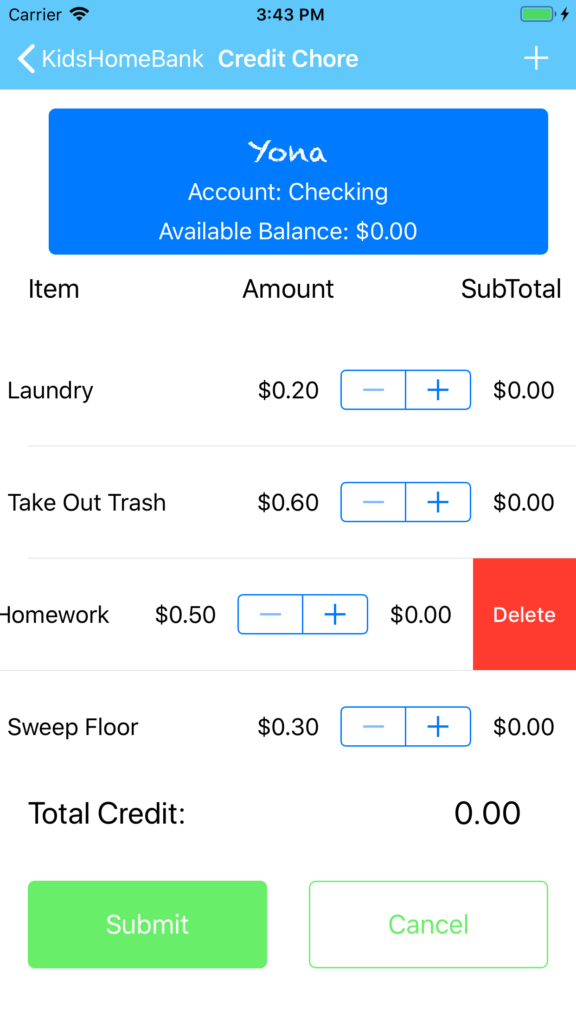
Slide left to delete. -

Tap on the chore to edit chore name and value. -
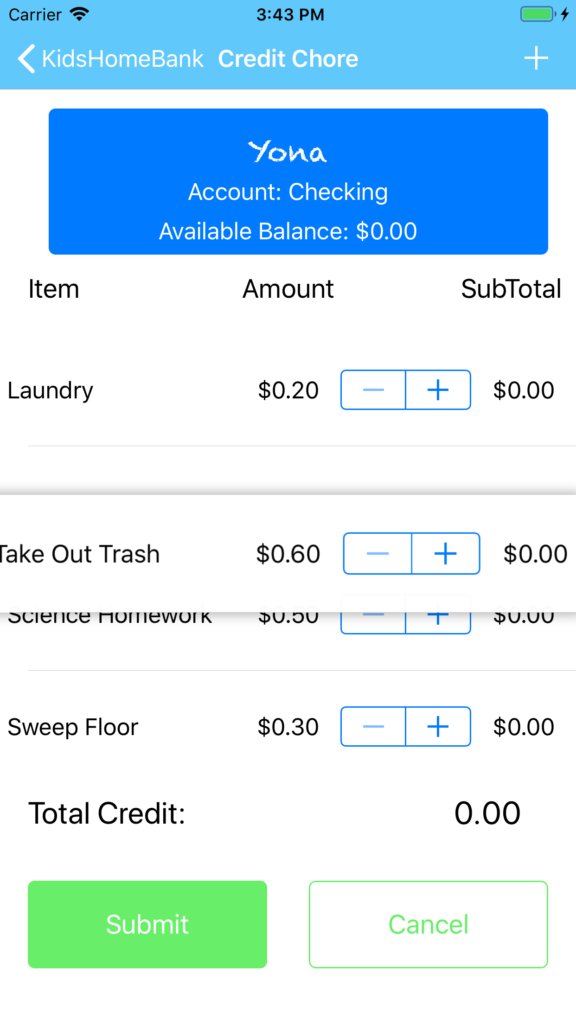
Long press and move chore item up or down to reorder list.
Payment for Chores
You can easily pay for chores in three simple steps!
Step 1: Select "Credit Chores" for the child to pay.
Step 2: Click on the stepper on each chore item pay for the chore completed. The stepper allows you to pay multiple quantity at a time. For example, if the child completed two loads of laundry, click on the stepper twice to pay for two loads of completed laundry.
Step 3. The application automatically tallies the subtotal payment for all the chores completed. Click "Submit" and the amount is credited into the child's Checking account.
-

Click on "Credit Chores" -
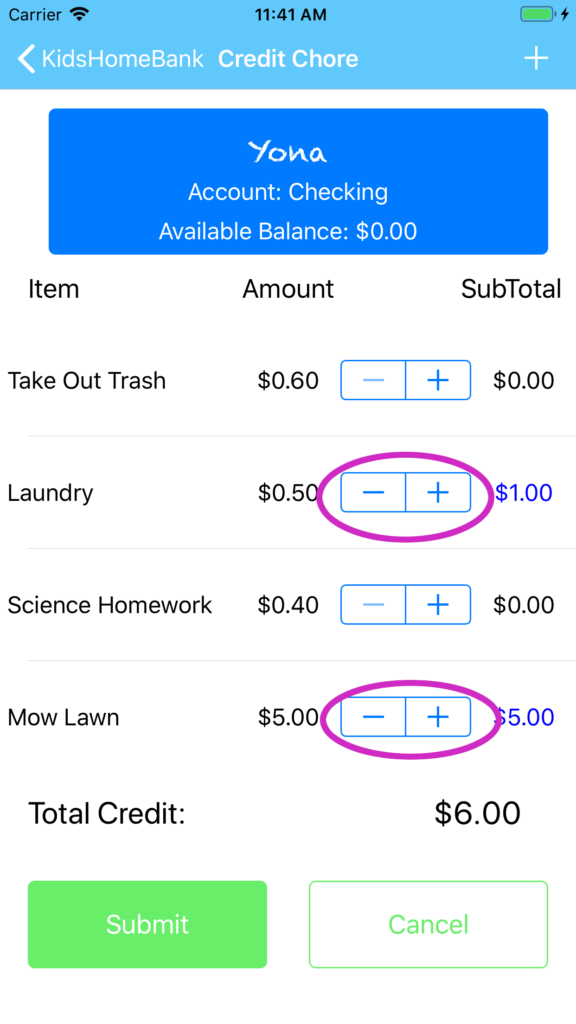
Use the Stepper to pay for multiple chores at a time. -
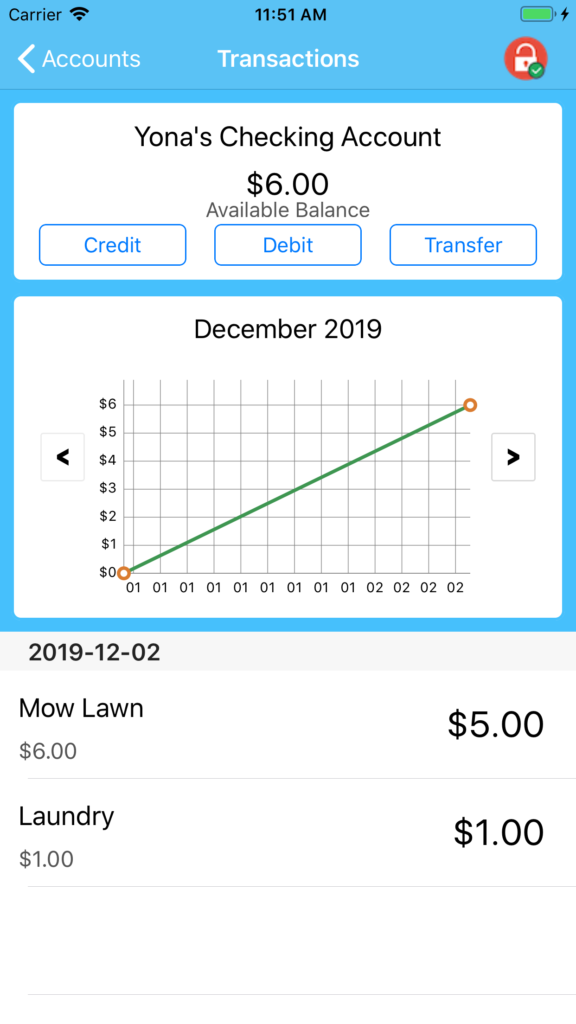
Child is paid.
Customize Child Account
Setting up Child Passcode
The first time you access a new Child's account, you will asked to setup a new Child Passcode. The Child Passcode allows the child to view only his or her account info.

Setup Child Profile Picture
Upon entering his or her own account, the child can select his or her own profile picture.
-
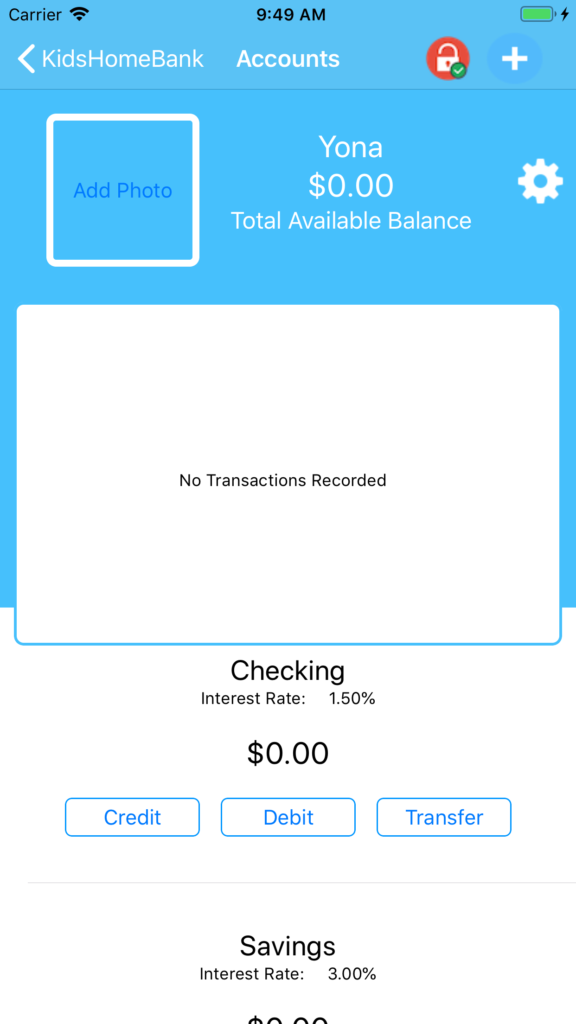
Click on 'Add Photo'. -
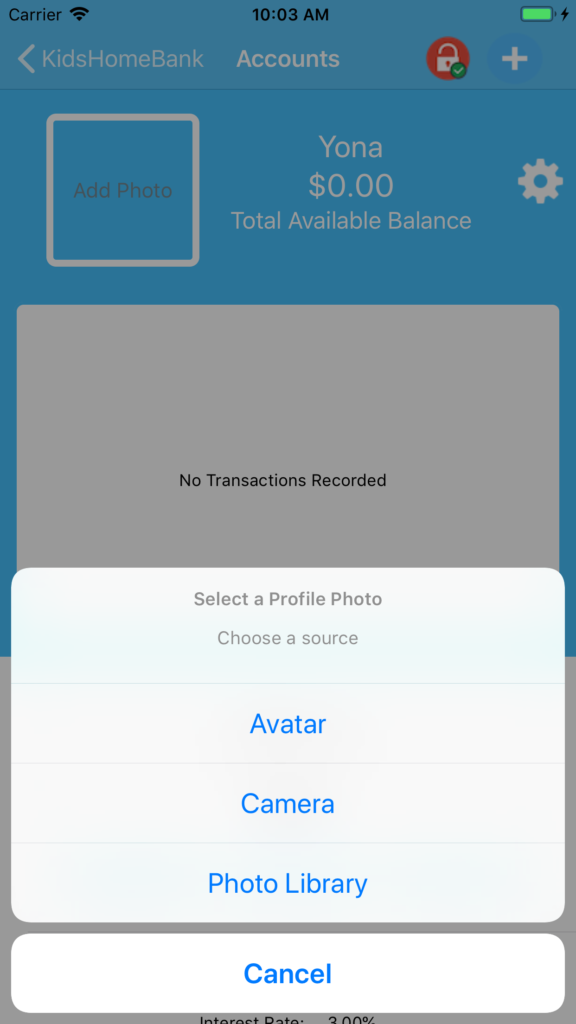
Select source for Profile Photo. -
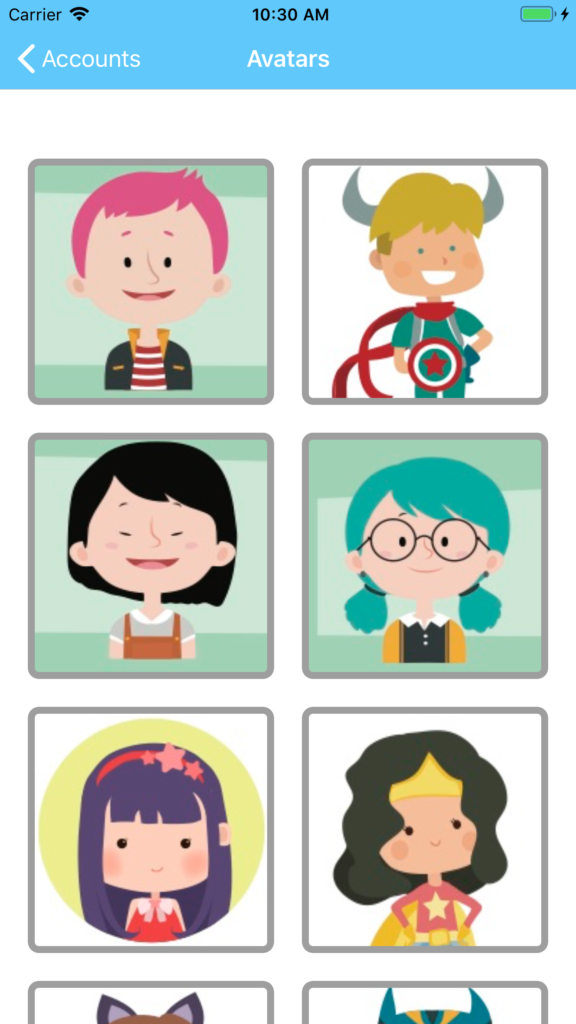
Avatar for Profile.
Parents can also update the profile picture from the main screen after entering their Parental Passcode.
-
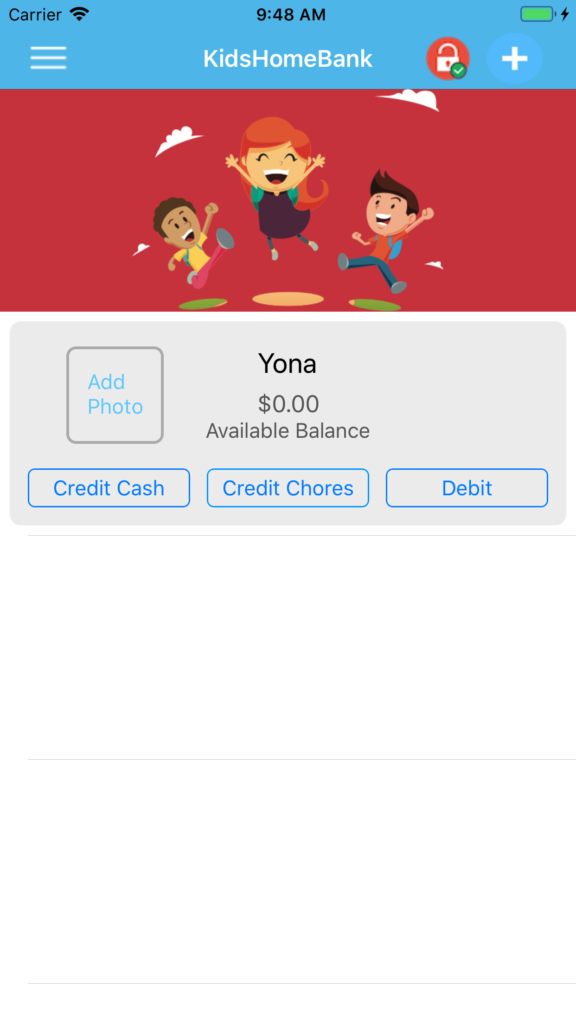
Click on "Add Photo". -
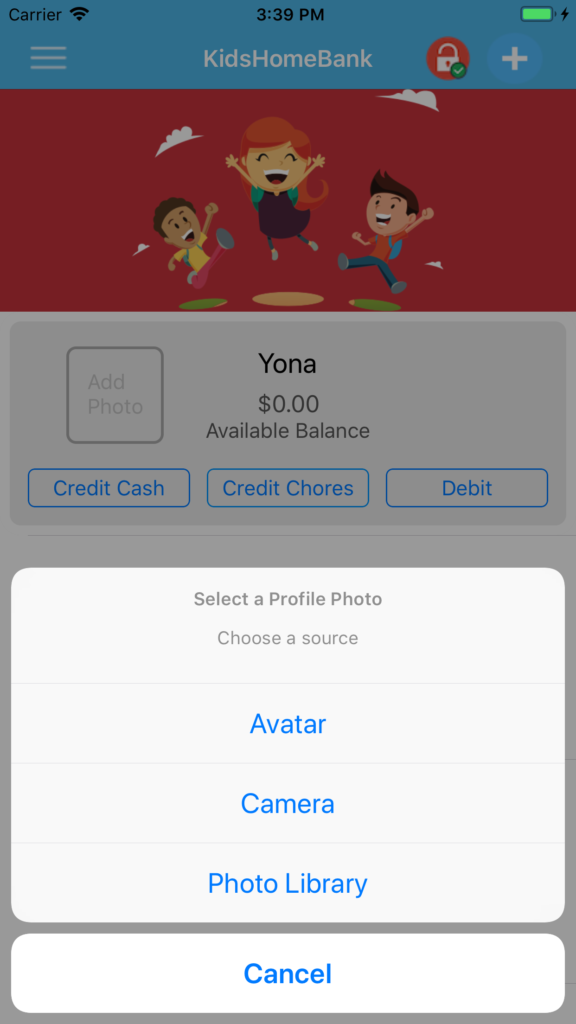
Select source for Profile Photo.
Change Child Passcode
Click on the Settings "Gear" icon in the child's account. Select "Change Passcode". The child will be asked to enter his or her current passcode first. Thereafter, the change passcode popup will be shown.
-

Click on "Gear" icon, select "Change Passcode" -
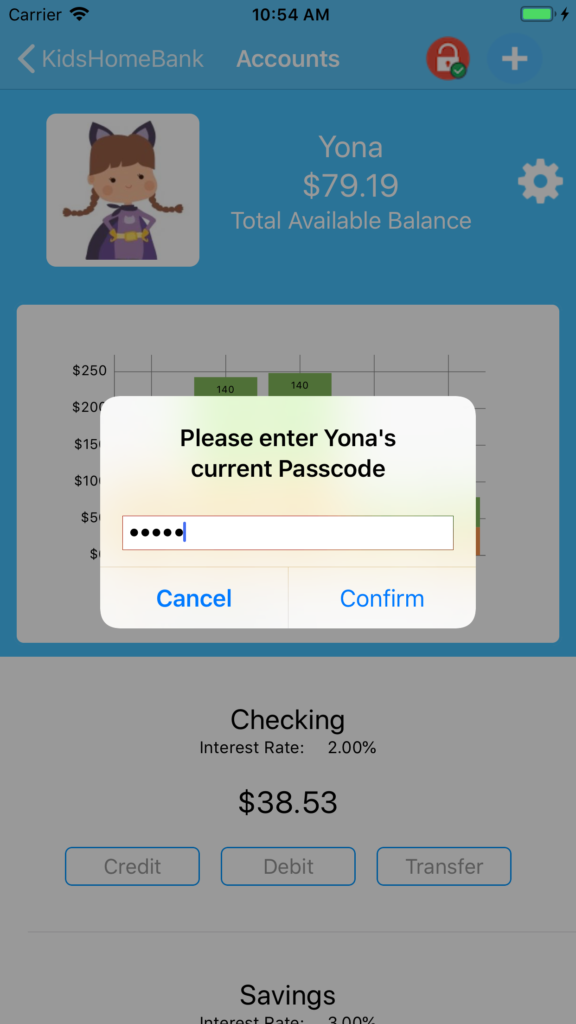
Enter current Passcode. -

Enter new Passcode.
Customize Background and Text color
The child can also customize the background and text color for his or her own account.
-
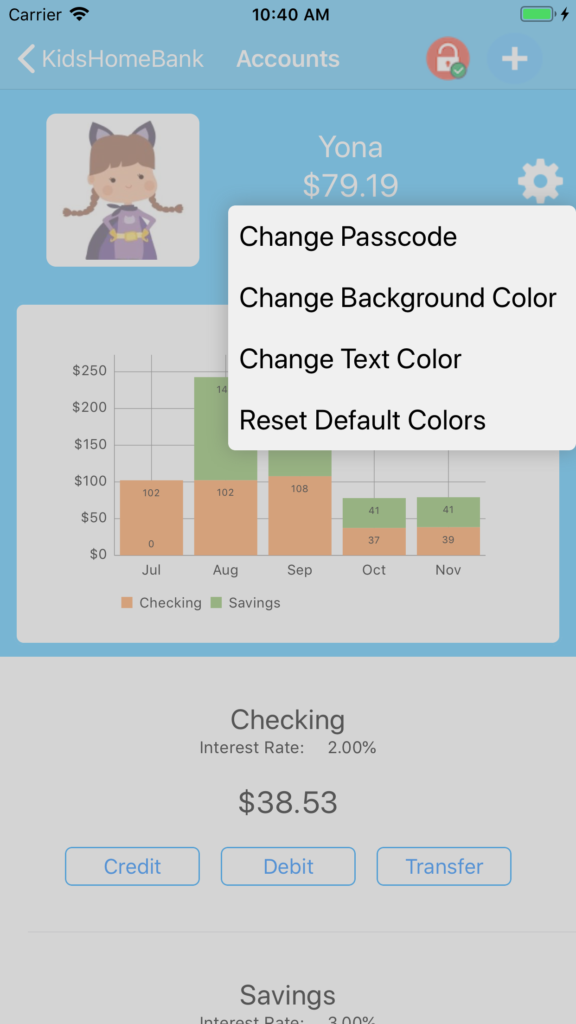
Click on the settings "Gear" icon. -
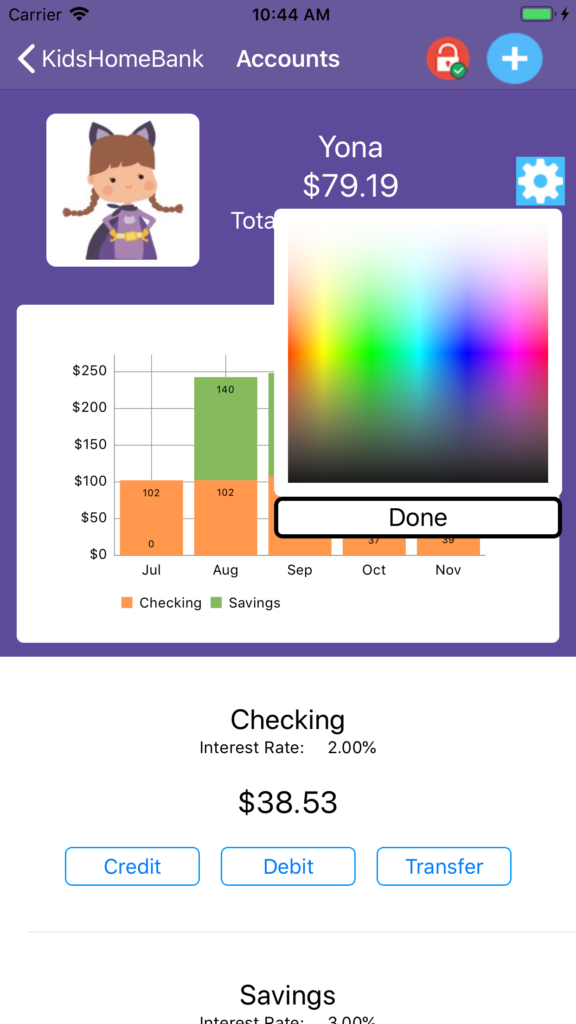
Select the desired background color.
Other Settings
Change Interest Rates
Step 1: From the main screen, select "Settings" from the top left hand corner.
Step 2: Select "Change Interest Rate" from the menu.
Step 3: Enter new Interest Rates and click "Submit"
Backup to Email
You can backup a copy of your Kids Home Bank transactions to email. This allows you to restore your transactions when you need it.
Step 1: From the home screen, select "Settings" from the top left corner.
Step 2: Select "Backup to email" from the menu.
Step 3: Enter the email address to send your backup file. Click "Send".
-
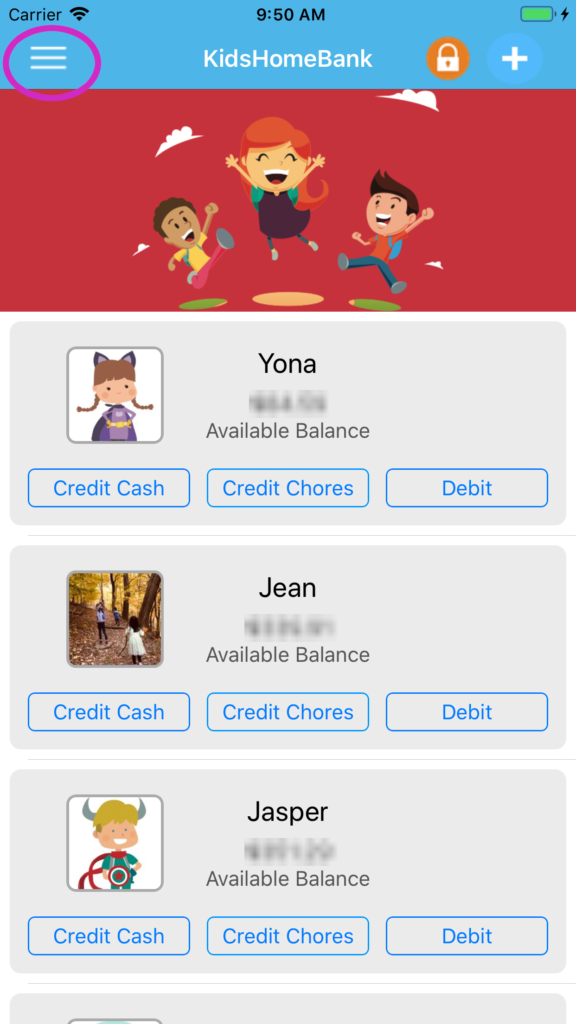
Select "Settings" from the top left corner. -

Select "Backup to email". -
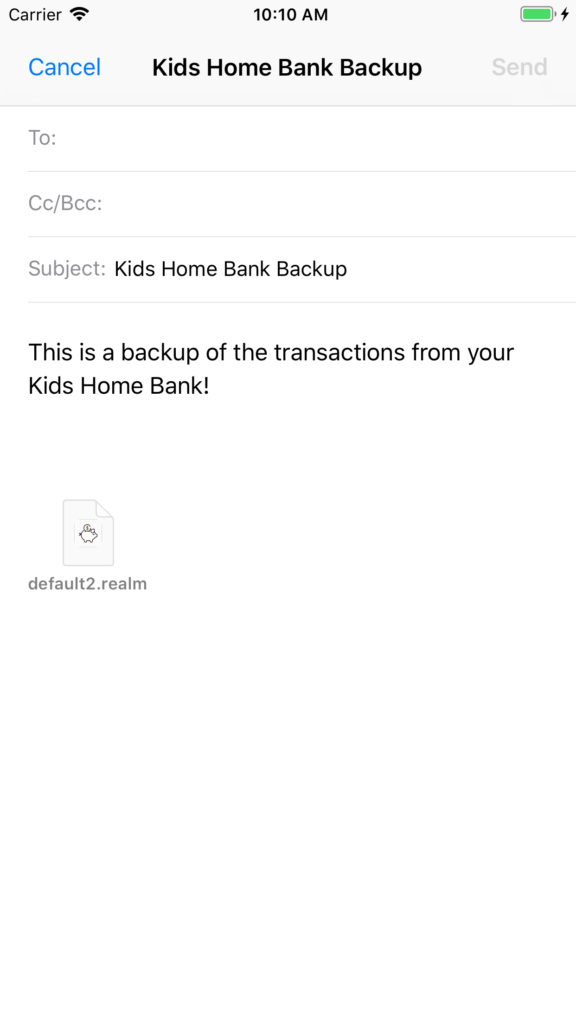
Enter email address and click "Send".
Restore backup from email
Step 1: Click on the KidsHomeBank attachment in your email.
Step 2: Select "Copy to KidsHomeBank".
Your backup will be restored in the KidsHomeBank application.
-
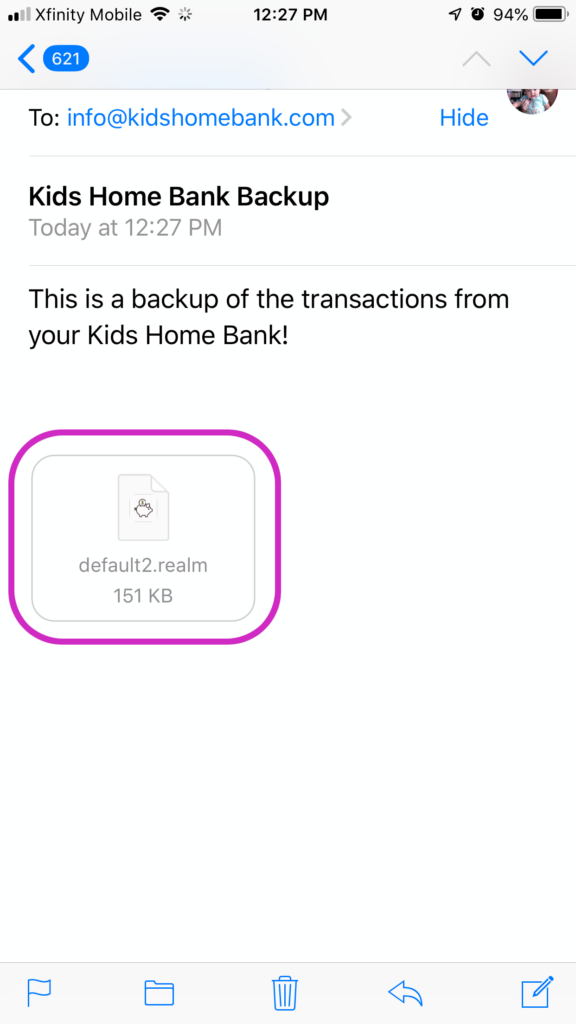
Click on KidsHomeBank attachment. -
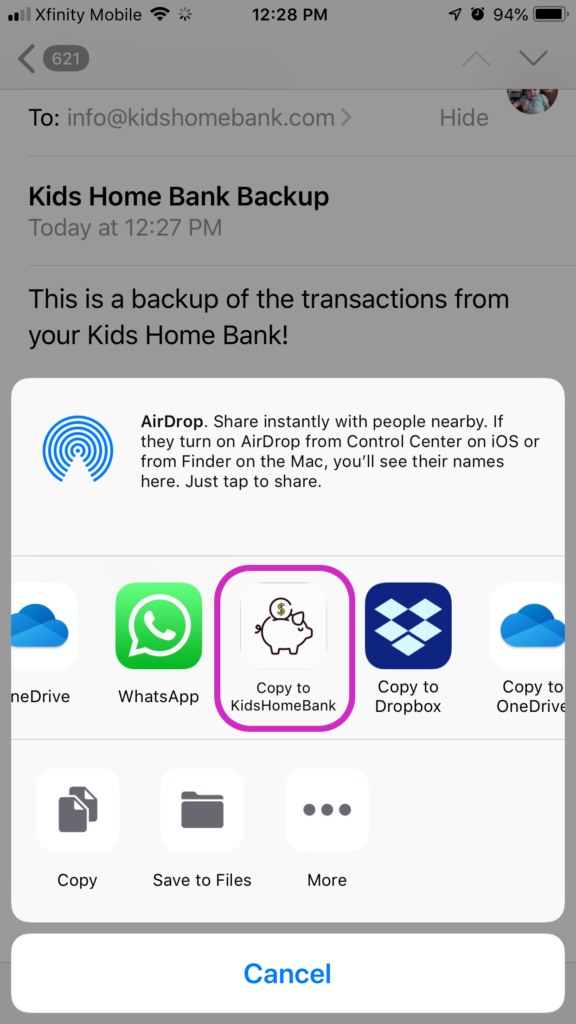
Select "Copy to KidsHomeBank"


